Monday, February 28, 2011

Finally, I'm able to share...

I've not been able to share some layouts and cards I've created for a little while now, and I'm excited that it's only one day away from March and I can finally share my exciting news here. :)  I was asked by Allison Davis to be a guest designer over at Sketch Support for the month of March and I've been hard at work creating some fun projects based off her sketches that will be revealed throughout March. Today, I am sharing this card I created for her creative team call. I will be posting my other creations too as they are posted over at her website...so stay tuned! :)
To create this card, I started with this sketch from Allison.

I started with a white cardstock base and stamped the circle stamps across the card diagonally with a pink inkpad. Then I stamped the same circle stamps again in green and blue, and punched them out to layer on top of the pink images. This was a quick way to "color" the background of the card.
After I finished the background, I cut a larger circle out from a green pattern paper, then inked the edges with the same pink ink. I had a leftover cow photo sitting on my desk, so I used that photo as the focal point, then added a hand-stamped saying with some mini alphabet stamps. The finishing touch was to add some clear gemstones in the center of the circles.
Supplies Used:
Stamper's Anonymous Tim Holtz Psychedelic Grunge Stamp Set
Ranger Distress Ink Pads: Worn Lipstick, Peeled Paint, Faded Jeans
EK Success Image Tree Stamps: Antique Typewriter
Uchida: Marvy Matchables Black Inkpad
Crate Paper: Restoration Line
McGill Punch: Word Tags
EK Success Circle Punches (various sizes)
Martha Stewart: Clear Gemstones
Foam Tape
Friday, February 18, 2011

Layout Share: You are my Favorite Valentine Gift

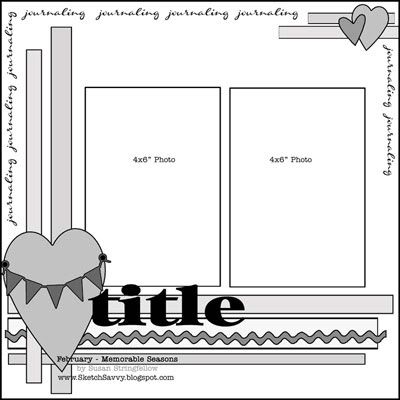
I just wanted to share another layout I completed yesterday using a sketch by Susan Stringfellow. The theme for the sketch was a love theme, so I picked these really old photos of my son and created a layout for him.
 I used papers from the Sassafras Indie Girl line and they matched his outfit perfectly! The heart background was trimmed down into a smaller square, then I inked the edges with blue ink. My photos were adhered to the background, then I added a green journaling rectangle sticker at the top to fill in the gap.
I love that these papers had such great details to them! I used the scalloped edge as a border under my photos and the base paper was already printed with those awesome stitch lines and flowers. All I added to the base paper were the stamped words "this is why I love you" that I repeated in place of the journaling on the sketch.
 To create the title, I stamped the words "You are my most favorite" by inking the word you in red ink, then using the black marker to ink up the rest of the words. The word "valentine" was created with the glossy chipboard alphabet letters, and to finish off the title, I stamped the word "gift" at the end. I also added glossy accents to the word "you" to help it stand out more.
 My heart accents were created with a stamp that I colored in with colored pencils and then cut out and attached with foam squares. It was such a fun layout to create and I was glad I was finally able to use these photos on a page!

Supplies Used:
Sassafras Lass: Indie Girl Collection
-Free Spirit, Affection, Eclectic Elegance, Journal Tags
American Craft Thickers: Sweet Love Tomato
Ranger Distress Inkpads: Barn Door, Chipped Sapphire
Uchida: Marvy Matchables Black Inkpad
EK Success Markers: Zib Writer and Brushables
Unity Stamps: Hello My Friend
Technique Tuesday Stamps: Ali Edwards stamp
EK Success Image Tree: Antique Typewriter alpha stamps
7 Gypsies Mini Labels: Naked Color
Ranger Glossy Accents and Matte Accents
Foam Squares
Colored Pencils
Sketch by Susan Stringfellow

* All products were purchased personally by me.

Wednesday, February 16, 2011

Card Share: My Love

This card was a really quick one to create as I just used the scraps left over from my kit. The felt sticker covered up a hole left in the pink flip note from a flower I had cut out, and I trimmed off the flip note tab, and added some scraps of papers to the bottom and sides of the card. 
 
I tied in the jewels with a row of jewels along the side of the card. I also added some green ric-rac left over from another project.

Supplies Used:
* Pink Paislee Sweetness Collection:
-Picture Perfect, Love Letters
-Flip Notes
-DooDads
* Maya Road Satin Pleat Ribbon: Cream
* Cream Card Base - From DT kit
Ranger Distress Inkpad: Vintage Photo
Fiskars Border Punch: Upper Crest
The Paper Studio Clear Gemstones

* Products received as Design Team Member. All other products were purchased personally by me.

Tuesday, February 15, 2011

Card Share: Thank You Flowers


This card was created with more scraps from my Memorable Seasons design team kit. I had some leftover satin pleat ribbon and I cut out the Pink Paislee name tag from the end of the paper, and covered it with a label and a hand stamped greeting. 

I also added some glitter and a punched border edge.

Supplies Used:
* Pink Paislee Sweetness Collection:
-Love Letters, Picture Perfect
* Maya Road Satin Pleat Ribbon: Cream
* Cream Card Base - from DT kit
Ranger Stickles: Diamond
Ranger Distress Inkpad: Vintage Photo
Yellow tag-cut from Pink Paislee Paper edge
7 Gypsies Mini Label: Naked Color
Basic Grey: Thank You Stamp
Tsukineko StazOn inkpad: Timber Brown
Fiskars Border Punch: Apron Lace

*Products I received as Design Team member. All other products were purchased personally by me.

Friday, February 11, 2011

Layout Share; Sipping Sweet Soda

This layout was made with a single piece of paper from the Pink Paislee Sweetness line. All I added to it were some cut out flowers and yellow sections cut from a flip note.
I started out by arranging my photos in a collage on the background paper, then added the yellow flip note cut into pieces in three spots on the layout.

 I also cut the flowers out of other flip notes and added them to the layout with foam squares. The words sweetest day were cut from another flip note and I edged it with some pink ink and added a little glitter to the words and flowers. 
 For my title, I used the word sweet that was already printed on the background paper and covered it with stickles glitter glue, then built the rest of my title around that with stamps. The word "soda" has glossy accents added to it for interest.

Supplies Used:
* Pink Paislee Sweetness Collection:
-Love Letters
-Flip Notes
Ranger Stickles: Diamond
Ranger Distress Inkpad: Worn Lipstick, Peeled Paint
Ranger Glossy Accents
EK Success Rebecca Sower Typewriter ABC stamps
Studio G Mini Alpha Stamps
Zig Black Pen
Foam Squares

* Products receives as Design Team Member. All other products were purchased personally by me.

Thursday, February 10, 2011

Layout Share: I {Heart} Dr, Pepper

This was another layout I created with the Design Team kit from Memorable Seasons. I really like how the colors worked so well with these Dr. Pepper Museum photos!
I used strips of paper to create the layers on the bottom of this layout. The chipboard frame was also layered with paper and I sanded the edges. The inside of the frame was stamped with the date.
 The title chipboard frame was also layered with paper, then stamped with a doily stamp that was heat embossed. I cut out a sign from one of my photos to use as the title and added some glitter stickers to the layout. The small crochet flower added the perfect touch! 
 I also used the flip notes to include my journaling and along the bottom under the date frame.

Supplies Used:
* Pink Paislee Sweetness Collection:
-Sweetest Day, Pretty Lace, Love Blooms
-Flip Notes
-Glitter Sticker elements
* Cream & Turquoise Crochet Flower-made by Julie at MS
* Maya Road Brown Satin Pleat Ribbon
* Maya Road Chipboard Frame
Maya Road Doily Stamp
Ranger Distress Inkpad: Worn Lipstick
Tsukineko Versamark Inkpad
CTMH White Embossing Powder
CTMH Date Stamp
SU Taken With Teal Inkpad
Black Zig Writer

* Products received as Design Team Member. All other products used were purchased personally by me.

Wednesday, February 9, 2011

Layout Share: Liquid Potion


I used the die cut heart paper that coordinated with this kit and just cut out the inside doily with an exacto knife, then I cut it up and used it in three places on my layout. Then I used some of the pleat ribbon to border it.
I colored the chipboard frame with a red inkpad, then added the glitter word "potion" for part of my title.
 The other fun part about this layout is that I cut the yellow tags from the ends of the paper that had the Pink Paislee name on them. I covered up the name with the sticker labels.

Supplies Used:
* Pink Paislee Sweetness Collection:
-Love Blooms
-Paper Heart Die Cut
-Glitter Sticker Elements
* Maya Road Cream Satin Pleat Ribbon
* Maya Road Chipboard Frames
* Pink Paislee Labels (cut from edges of paper strips)-yellow
Studio G Alpha Stamps
Ranger Distress Inkpad: Barn Red
7Gypsies Mini Labels: Naked Color
Zig Black Pen

*Products received as Design Team Member. All other products were purchased personally by me.

Tuesday, February 8, 2011

Layout Share: Museum Photography

 
 I lined my photos up for this layout, then cut out the brown paper that said portrait photographer and used that along the left side of my layout at the top. Then I just added various other papers to the layout to balance it out. 
 
I used a border punch to add some soft edges to the layout and cut out flowers from various papers to bring in all the colors on this layout.
 Stickles glitter was added to the flowers and I inked the edges of all the papers with brown ink.

Supplies Used:
* Pink Paislee Sweetness Collection:
-Love Letters, Picture Perfect, Love Blooms
Ranger Stickles: Diamond
Ranger Distress Inkpad: Vintage Photo
Fiskars Border Punch: Upper Crest
Cream Cardstock
Zig Black Pen

* Products received as Design Team Member. All other products were purchased personally by me.

Thursday, February 3, 2011

Layout Share: Smitten with a Kitten

This was the first layout I created with the papers from the February DT kit I received from Jill at Memorable Seasons. 
For this layout, I just used some strips of paper that were rounded off on the edges, and included a flip note for my journaling area. 
 The chipboard frame was covered with pattern paper and I included the date stamped inside. The crochet flower fit just inside the frame perfectly. 
The yellow glitter letters were very bright yellow, so I just inked them with some creamy brown chalk ink to soften the yellow color a little bit.

Supplies Used:
* Pink Paislee Sweetness Collection:
* -Sweetest Day, Love Letters, Pretty Lace
* -Flip Notes
* -Glitter Alpha Stickers
* Maya Road Chipboard Frame
* Red & Green Crochet Rosebud- made by Julie, included in DT kit
Colorbox Chalk Ink: Creamy Brown
Studio G: Circle Stamp
CTMH: Month Date Stamp
Technique Tuesday: Numbers stamps
Ranger Distress Inkpads: Brushed Corduroy, Peeled Paint, Worn Lipstick
WRMK Corner Chomper
DMD Inc: Kraft Cardstock
Zig Black Writer

*Products received as Design Team Member. All other products were purchased by myself personally.

Wednesday, February 2, 2011

Yellow Rose Necklace

Here is one of the first projects I created with the Design Team Kit from Memorable Seasons.
 Jill included some awesome crochet flowers made by Julie and I used my large yellow one for this necklace in the center. The red jewel in the center was hot glued in place.
 To create the side flowers, I used this satin pleat ribbon:
I punched a circle out of cardstock, then used hot glue to attach the ribbon to the punched circle in a spiral shape. This was a super easy way to create a beautiful flower! I also glued the other two red jewels in the centers of these ribbon flowers.
 Once the flowers were created, I glued the individual flowers down to a piece of cream muslin fabric, then trimmed around it, leaving a tab at the top of each of the ribbon flowers. I attached a crimp clamp to the tab, and reinforced it with hot glue so I could attach my jewelry chain.
Then the last step was to attach the chain to the crimp clamp, and then I finished the necklace off with a jewelry clasp.

I really LOVE how this project turned out and I can't wait to create some more custom necklaces!

Supplies Used:
*Maya Road Satin Pleat Ribbon: Cream
*Yellow Crochet Rose: made by Julie, included in DT kit
*Websters Pages: Bloomers (red centers for flowers)
White cardstock circles, EK Success Circle Punch
Cream Muslin Material
Jewelry Supplies: Silver Chain, Crimp Clasps, Necklace Clasp
Hot Glue Gun


*Products received as Design Team Member. All other products were purchased by myself personally.