Showing posts with label Tips and Techniques. Show all posts

Tuesday, March 22, 2016

Barbed Wire Wreath Spiral Card and Video

I have been playing with my MISTI tool and my stamps lately, as I have been inspired by an older post from Iliana about using shape templates to create a spiral stamped image. You can download the octagon template I used directly from her blog post.  I printed the template, laminated it and added some double sided removable poster tape to the center so it would hold my cardstock in place while I was stamping.  

Here is the finished card:


And a video I made showing the process of stamping with the MISTI template and creating the card:


Supplies Used:
Texana Designs Stamps: Mini BW Wreath, So Happy For You
Georgia Pacific: White Cardstock
Crate Paper: Acorn Avenue (Cashew Shop)
We R Memory Keepers: April Showers (Simply Spring)
Tsukineko: Versafine Inkpad (Onyx Black)
Hero Arts: Soft Granite Inkpad
Ranger: Tim Holtz Distress Crayons (Fossilized Amber, Peacock Feathers); 
Distress Inkpads (Fossilized Amber, Peacock Feathers); Foam Blending Tool
Kuretake: Zig Writer (Platinum)
Cheery Lynn Designs: French Pastry Doily Die
Spellbinders: Nestabilities Die (Small Standard Circles)
Freckled Fawn: Enamel Dew Drop Stickers (Est Blue)
3M Foam Tape
Paint Brush, Water
Ranger Heat It Tool
MISTI Tool

Craft Mat

Thursday, January 24, 2013

Lemur Card: Cloud Tutorial

I've been busy creating some cards the past few weeks and can't wait to share them with you all! Today I want to share a fun card that would be perfect for Valentine's Day along with an easy tutorial for making a cloud background. This card uses stamps from Texana Designs.
 Here's the finished card and a detail shot:

 And here's how to create the cloud background:

Start with some scrap cardstock and cut it into a cloud shape with your scissors. The bottom edge doesn't need to be cut, just the top edge. You will also need a sponge and your inkpad. I used Weathered Blue Distress Inkpad.
 
 Tap your sponge on the inkpad to pick up the color, then rub the sponge over the edge of the cloud cutout onto your card base. I usually start at the top near one of the edges. You will just rub lightly then move the cloud shape over a bit and rub again. This gives you the depth of color and looks like lots of big fluffy clouds. Just know that the color looks really light until you move your cloud cutout over, then you will see your color pop off the white background. Continue moving the cloud cutout around until you have sponged all your clouds on the card front.

Here's what mine looked like when I finished the whole front of the card:

I didn't take pictures of my coloring steps, but I stamped the lemurs with my black Memento inkpad and colored the image with my Promarkers. I cut the image out using my scissors and a craft knife. Then I die cut an edge of a frame label on black cardstock stamped my sentiment on a strip of red patterned paper. I glued the red strip down onto the black piece and trimmed the edges, and adhered that whole piece to my card. Then I glued down my lemurs to the card front
 
 Once I had my lemurs down on the card front, I took my large house stamp and trimmed the heart off the top of the chimney. This way I can just just the heart on my project, but the stamp can be put back together when I use the stamp on my clear block. I do tend to get "scissor happy" with my stamps and cut all my sentiments apart too...so many more possibilities for ways to use them! :)
 

With my heart stamp, I inked it in red ink and stamped it three times above my lemurs without reinking. This gives me a 1st, 2nd and 3rd generation inking of the same stamp. Each time I stamp it, the ink will be lighter. This is a great way to have ink colors in lighter tones that match the original color.
 

To finish off the card, I colored some clear gemstones with my black Promarker (alcohol ink marker). You could also use Copics or Sharpie markers. I use my craft knife to cut these gems apart and I use the edge of the craft knife blade to pick up the gems and place them on my projects.


And here is the finished card again:

Supplies Used:
Georgia Pacific: White Cardstock
Sweetwater: Autumn Sweet Black Polka
Close To My Heart: Red Linen Pattern
Letraset Promarkers/Flexmarkers: For Lemur--Nutmeg, Saddle Brown, Morning Mist, Grey Squirrel, Cool Grey 1, Blender.  For Tree—Caramel, Burnt Sienna, Walnut, Umber. For Gemstones: Black.
Spellbinders: Nestabilities Die (Labels 8)
We R Memory Keepers: Corner Chomper (1/2”)
Ranger: Distress Inkpads (Weathered Wood, Fired Brick, Black Soot); Foam Blender Tool
The Paper Studio: Clear Gemstones

*Products received as Texana Designs Team member. All other products were purchased personally by me.

Thursday, July 19, 2012

Merry Tex-Mas Snow globe card... take 2

I created this green snow globe card last year based on a card sketch by Allison Davis, and I wanted to redo the card using all Texana Designs Stamps, so I came up with this cream version and I think I like it even better!


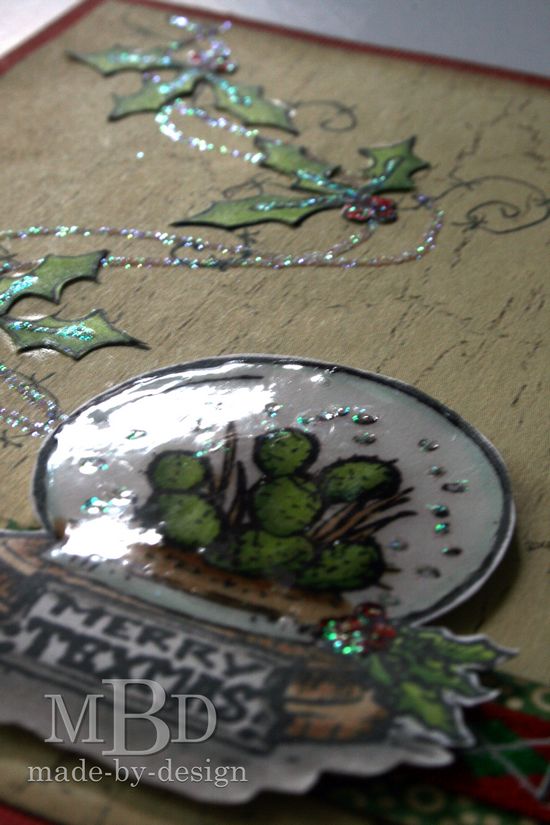
I started by stamping the holly in various directions on the cream background paper, then I added a swirl of glue pen and some prisma glitter to the background to connect the holly stamps to where the snow globe stamp will be adhered. I stamped the holly to look like a "swirl" of Texas "snow".

Once the background was prepped, I stamped the holly images on white cardstock and cut them out and glued them on top of the stamped holly leaves. Tweezers worked great on these tiny stamped images!

For the snow globe image, I stamped it on white cardstock then colored it with my copic markers. I added dots of glitter to the snow globe image, then covered the glass part of the snow globe with glossy accents. Once it was all dried, I cut it out and used foam tape to adhere it to the card.


To finish off the card, I cut a strip of green pattern paper and wrapped some ribbon around it. This whole section was attached to the card front with my Tiny Attacher staples.


Here's the finished card all by itself:


Supplies Used:
Texana Designs Stamps: 100706S Snowglobe (Small), TX046 Holly
Cardstock: Bazzil (Red), Georgia Pacific (White)
Pattern Papers: October Afternoon (Thrift Shop), K&Co (Yellow Distress Wood Flat)
Ranger Distress Inkpads: Walnut Stain
Ranger: Diamond Stickles, Glossy Accents, Foam Blender Tool
Tsukineko: Memento Inkpad (Tuxedo Black)
Copic Markers: YG03, YG63, YG67, E31, E33, E37, W1, W3, W5, BG10, C1, R24, R29, R39
Ribbon: American Crafts
Other: Prisma Glitter, Tim Holtz Tiny Attacher
Allison Davis: Card Sketch #14

Tuesday, July 3, 2012

Pencil & Ink Resist Technique

I want to share a new technique I came up with last week...I was over at my friend's house with the ladies from Texana Designs Team and we had a stamping play-day. I tried to limit myself to bring just one bag of supplies for the day, so I was having to improvise a little. :)

I didn't bring many pattern paper scraps with me, and I was working on a card that begged for some patterns, so I played around with my supplies and came up with a fun new technique. I'm calling it "Pencil & Ink Resist".

To begin with, I drew some patterns on some white cardstock with a white colored pencil. I drew polka dots on one piece and a plaid design on the other. Then I took two colors of Distress inkpads and applied them directly to paper over the patterns I had drawn. The dye ink covered the paper completely except where my colored pencil lines were. I used a baby wipe to remove the excess ink from my colored pencil lines and was left with some beautiful patterns!
The next step was to stamp on the patterns. I didn't have my StazOn inkpad with me, but I used my Memento Black instead, and the pencils semi-resisted that ink also. It gave it a distressed look, but if I wanted solid black lines, I would use the StazOn next time. Overall, I love the way these patterns turned out!

I used my copic markers to color in the mason jar stamped image. The saying reminded me of sweet tea and I think it's really cool to see mason jars used as glasses, so here is my Mason Jar full of "sweet tea":
It's hard to tell in this picture, but the jar highlights have glossy accents on them to make it look more "glass-like". I also had left my baker's twine at home and was really wanting a pop of red color around the jar, so I wrapped a piece of white string around a piece of cardstock and used one of my copic markers to create red stripes. This is a great way to create customized baker's twine colors. Here's my finished card:

Supplies Used:
Texana Designs stamps: TD031 Everything is “sweet” in Texas, TX019 Mason Jar, FR008 Rectangle
Bazzill Cardstock: Tan, Red
Georgia Pacific Cardstock: White
Tsukineko: Memento Inkpad (Tuxedo Black)
Ranger: Distress Inkpads (Crushed Olive, Peacock Feathers, Fired Brick, Brushed Corduroy); Glossy Accents
Copic Markers: BG10, C1, E31, E33, E37, R29
Making Memories: White Scrapbook Stitches
Prismacolor: White Colored Pencil
Fiskars: Border Punch (Scalloped Sentiment)
Foam Tape

Thursday, July 14, 2011

Layout Share and Sketch Support Giveaway

 Today I have a layout to share along with a giveaway for one of the newest Sketch Support books...
be sure to read all the way to the end and enter to win!

“Sporting Heavy Metal”

Variation #1:
What I fell in love with on this sketch was the sewn on star accents. I had just taken photos of my son when he got his braces on this week, and the stitched row of stars reminded me of braces, so I went with that theme instead of the stars. I created my own “brackets” with the larger square brads, then I glued a small green square of cardstock to the top of the silver square (to mimic his green rubber bands he chose), and glued the smaller square brads to the top to complete the bracket. For the smaller brads, I just cut off the prongs on the back with my wire cutters first, then tapped the square brad head flat with my hammer. The finished brackets were then glued down to strips of paper and I added a silver wire underneath to complete the look of my custom braces. Hot glue was the best adhesive to use for these since it was quick and holds great. Other than trading the stars for brackets, the only other variation to this part of the sketch was that I added the paper strips and kept the row straight instead of adding them in a curve.
Here's a quick photo tutorial of how I created the brackets for this page:
I started with the small square brads and I used my wire cutters to snip the tabs off the back of the brads.
Then I flattened each small square brad with my craft hammer.
I took the larger square eyelets and set them with my Crop-a-dile tool.
Then I used some matte accents (liquid glue) to attach a small square of green cardstock to the top of each larger square. This will give my brackets the look of having the rubber band around them once I am finished.
To finish off each bracket, I glued four small square brads on top of the green cardstock. I used a hot glue gun for this step. The brackets were glued down on top of some craft wire on my layout.

 Variation #2:
I used 7- 4x6 photos instead of the 6 photos detailed in the sketch. The only photo I cropped down was the close-up photo of my son’s braces and I only trimmed about ¾” off the left side.

Variation #3:
Because I added larger photos and a second row on the second page, I didn’t have as much room for the star shape, so I substituted the journaling notebook page in place of the larger star shape.

Variation #4:
For my title, I stamped the word “heavy” on some coordinating cardstock and colored in the letters with a red marker. Then I spelled out the words “sporting” and “metal” with various metal alphabets.

Supplies - Patterned Paper: Scrap Within Reach ‘The District 406’; Cardstock: Bazzill; Alphabets: Autumn Leaves Stamps ‘Snap Frame’, Making Memories, K& Company; Adhesive: Hot Glue Gun and Glue Dots; Brads: Making Memories, WeR Memory Keepers; Inkpad: Marvy Uchida (Black); Stickers: 7 Gypsies ‘Mini Labels’; Journaling Block: Making Memories; Pens: Zig Writer ‘Black’, Close To My Heart Marker ‘Cranberry’; Other: Fibre Craft ‘Silver Wire’, Bind it All ‘Wire Cutters’, WeR Memory Keepers  'Crop-a-Dile Tool'; Making Memories ‘Craft Hammer’; Sketch: Allison Davis (2 pg sketch #17).

Now on to the giveaway! :) The sketch came from one of the newest books just released by Scrapbook Generations, called Sketches for Scrapbooking, Volume 8. This book is filled with 30 different sketches all in two-page layouts. You can use one side of the sketch to create a single page layout, or use the sketch as drawn to create a double page layout.
For more ideas on how to use sketches creatively, be sure to check out the Sketch Support website.

To be entered in the drawing to win a copy of this newly released sketch book, please be sure to leave a comment on this blog.  Contest will close on Friday, July 15, 2011 at midnight CST. The winner will be randomly chosen from all comments posted before the deadline, and winner must be able to email their shipping address to me.

Good luck!! :)
Tuesday, April 26, 2011

It's my turn to host a challenge over at Memorable Seasons and this week's challenge is a really easy one! :) You have until the end of April to submit a project and you will be entered in the monthly drawing. Here is the thread you need to link your cards to when you are finished.

So here's my challenge:
Create a card with a circle background. You can create the circles from anything you'd like: stamps, pattern paper punched circles, etc. Just use your imagination!

Here's my card:

And here's how I created it:
I stamped a circle image stamp in pink ink on my card base. Then I stamped the same image with blue and green ink too. I punched out the image with various sized circle punches and layered them onto the pink image. I punched some of the circles smaller than their original size so that the stamped pink circles would be larger and frame them. This was an easy way to combine the three colors on the background.
Then I cut out a larger circle from pattern paper to frame my focal point and added a photo on top of that. My title is stamped with a small wooden alphabet stamp. I also added jewels to the centers of the circles.
Can't wait see what you all come up with for this challenge! :)

Supplies Used:
Stampers Anonymous Tim Holtz Stamps: Psychedelic Grunge
Ranger Distress Ink Pads: Worn Lipstick, Peeled Paint, Faded Jeans
Marvy Uchida: Marvy Matchables Black Ink Pad
EK Success: Antique Typewriter Alphabet
McGill: Word Tags Punch
WeR Memory Keepers: Corner Chomper
The Paper Studio: Clear Gemstones
Crate Paper: Restoration line
Foam Squares
White Cardstock
Photo Credit: Made By Design.

* All supplies were purchased personally by me.

Tuesday, April 5, 2011

Teaching a Stamping Class... Cling + Bling = Spring

For those of you who are local to the Central Texas area, I will be teaching a stamping class at Stamp Salado on Tuesday, April 19th from 10:30am-12:30.  We will be creating three finished cards (two pictured below).
The class will be focusing on using cling stamps, bling, and the theme of spring! 
To sign up for the class, please call Sandy at Stamp Salado to reserve your spot. (254) 947-8848


CLING +  BLING  =  SPRING
Tuesday          April  19         10:30
Instructor   -  Megan
Fee   -  $22.

Supplies you will need to bring  -  Basic  Kit **
 

What do you get when you combine these elements together:  Cling, Bling
 and Spring?   A fun class focusing on the use of cling stamps with pops of bling all using images of spring!  During this class you will create three different cards with several cling stamps using a variety of stamping techniques.   The colors you will create using inks will be amazing and will be a wonderful addition to your stamping knowledge.

** If you are taking a class at Stamp Salado, you will need to bring 
a Basic Kit with the following items:
pencil, adhesive or double stick tape, fine black pen, detail  scissors, stipple brush(es),  red line tape (like Wonder Tape),  bone folder, x-acto knife, personal paper trimmer, water brush, ruler, glue stick, liquid  glue (dries clear), and glue dots. 

The store will provide items such as ink pads, embossing powders, cardstock and other elements needed for the class.
 
Pre-paid reservations are required.    
You can register by phone with  MasterCard,  VISA,  Discover and  American Express. 
(254) 947-8848
        Refunds in the form of store credit will be given on cancellations up to 3 full days prior to class date.
 
I look forward to seeing you at my class! :)

Monday, February 28, 2011

Finally, I'm able to share...

I've not been able to share some layouts and cards I've created for a little while now, and I'm excited that it's only one day away from March and I can finally share my exciting news here. :)  I was asked by Allison Davis to be a guest designer over at Sketch Support for the month of March and I've been hard at work creating some fun projects based off her sketches that will be revealed throughout March. Today, I am sharing this card I created for her creative team call. I will be posting my other creations too as they are posted over at her website...so stay tuned! :)
To create this card, I started with this sketch from Allison.

I started with a white cardstock base and stamped the circle stamps across the card diagonally with a pink inkpad. Then I stamped the same circle stamps again in green and blue, and punched them out to layer on top of the pink images. This was a quick way to "color" the background of the card.
After I finished the background, I cut a larger circle out from a green pattern paper, then inked the edges with the same pink ink. I had a leftover cow photo sitting on my desk, so I used that photo as the focal point, then added a hand-stamped saying with some mini alphabet stamps. The finishing touch was to add some clear gemstones in the center of the circles.
Supplies Used:
Stamper's Anonymous Tim Holtz Psychedelic Grunge Stamp Set
Ranger Distress Ink Pads: Worn Lipstick, Peeled Paint, Faded Jeans
EK Success Image Tree Stamps: Antique Typewriter
Uchida: Marvy Matchables Black Inkpad
Crate Paper: Restoration Line
McGill Punch: Word Tags
EK Success Circle Punches (various sizes)
Martha Stewart: Clear Gemstones
Foam Tape

Thursday, October 21, 2010

Sketch Share:

This month over at Memorable Seasons, we were given another great sketch created by Liz Chidester.

I love working with sketches and this one was no exception. Here's the layout I created based on her sketch:
I did some different techniques on this layout, so I took some pictures while I was making it so I could share a short tutorial here on my blog. I started with this awesome paper from the BoBunny Cambridge collection:
I wanted to accent it with some reds and deepen the colors a bit, so I cut a circle from some scrap cardstock, then masked off the circle, and sprayed around it with red mist.
I did the same thing, except repeated with a dark brown color and I used the negative part of the circle as a mask to add color to the center of my page.
Once the paper dried completely, I used my sewing machine to add a zig zag border to the circle.
And here's what the background looked like when I was finished:
Instead of using two pictures, I used a photo my son picked out for his school Rock Star project along with his rough draft words. I love that they were handwritten and edited by him. I added a few strips of coordinating paper from the Cambridge collection to ground my photo and his paper. I tied these strips in with the rest of my layout by stitching them on the machine to match the same circle detail in the center of the layout. My chipboard title was placed on top of the small strips at the top. I also added some small yellow alphabet stickers for the second word of the title.
 Of course, the title for this layout needed to be carried through with some punched star accents. Then I had some fun creating some drama with these little silver stars.
First, I used my glossy accents liquid glue to add tiny dots in a swirl pattern.
Then I used a die cut tool that has a sticky end and a flat end to position a star on each of the dots of glue.
Here's what one of my finished swirls looks like:
And lastly, here are the journaling sections I added to this layout:

Supplies Used:
Bo Bunny Cambridge papers:
Victory Cup Dot
My Little Shoebox Mini Alphabet Letters: Pearl
American Crafts Thickers: Platforms Yellow Chipboard Letters
EK Success Curvy Cutters: Circle and Exacto Knife
EK Success Border Punch: Binding Edge
EK Success Star Punch (Lg star)
Creative Works (Sm star)
Tsukineko Walnut Ink Antique Spray: Java and Cherry Blossom
Sulyn Industries: Mini Glitter Stars
Ranger: Glossy Accents
Sewing Machine w/ zig zag stitch and black thread
Sketch by Liz Chidester

All products were from my personal stash.