I just wanted to invite everyone to the "Moody Moody May Day" Online Crop over at Memorable Seasons this weekend. This is in honor of National Scrapbooking Day...and of course, die hard scrappers that we are, we are extending the fun through the weekend with challenges posted today and tomorrow and time on Sunday to finish up your projects. The best part of this crop is that packing up supplies and hauling them somewhere is NOT required...you can scrapbook at home and you can scrap in your jammies! :) There will be challenges for all the colors, games, prizes and great sales in the online store! Here's the details....
(link to Memorable Seasons Online Store--click here)
Tonight marks the start of our "Moody Moody May Day Crop"!! We hope you are getting prepared to join us in all the fun challenges, games and prizes. To help you be ready, we wanted to go ahead and give you a bit of a preview of what to expect. We want you to "get out your mood rings and examine all the colors you see." You will want to have plenty of those colors in your stash for this crop. Our challenges, beginning at 6 PM CST on Friday night and continue through 6 PM on Saturday night, will involve the following colors:
-orange
-blue
-white
-purple
-red
-black
-green
-yellow
-brown/kraft
Also, check out the moods in that ring as well. Your layouts may be required to have an associated theme. Gather pictures and your thoughts that may include some of the following themes:
-adventure
-sad/difficult times
-royalty
-love/relationships
-birthday/family celebrations
-guilty pleasures
Other supplies you may need include:
-crayons
-a lighter
-white tissue paper
-glue stick/mod podge
-stamps
-paper scraps
-Solid colored Cardstock
-Patterned Papers
I look forward to seeing you all there!

Friday, April 30, 2010
Wednesday, April 28, 2010
He. She. They... layout share
Here's another layout I created with the beautiful papers from the American Crafts Letterbox line that Jill at Memorable Seasons sent me to work with this month.
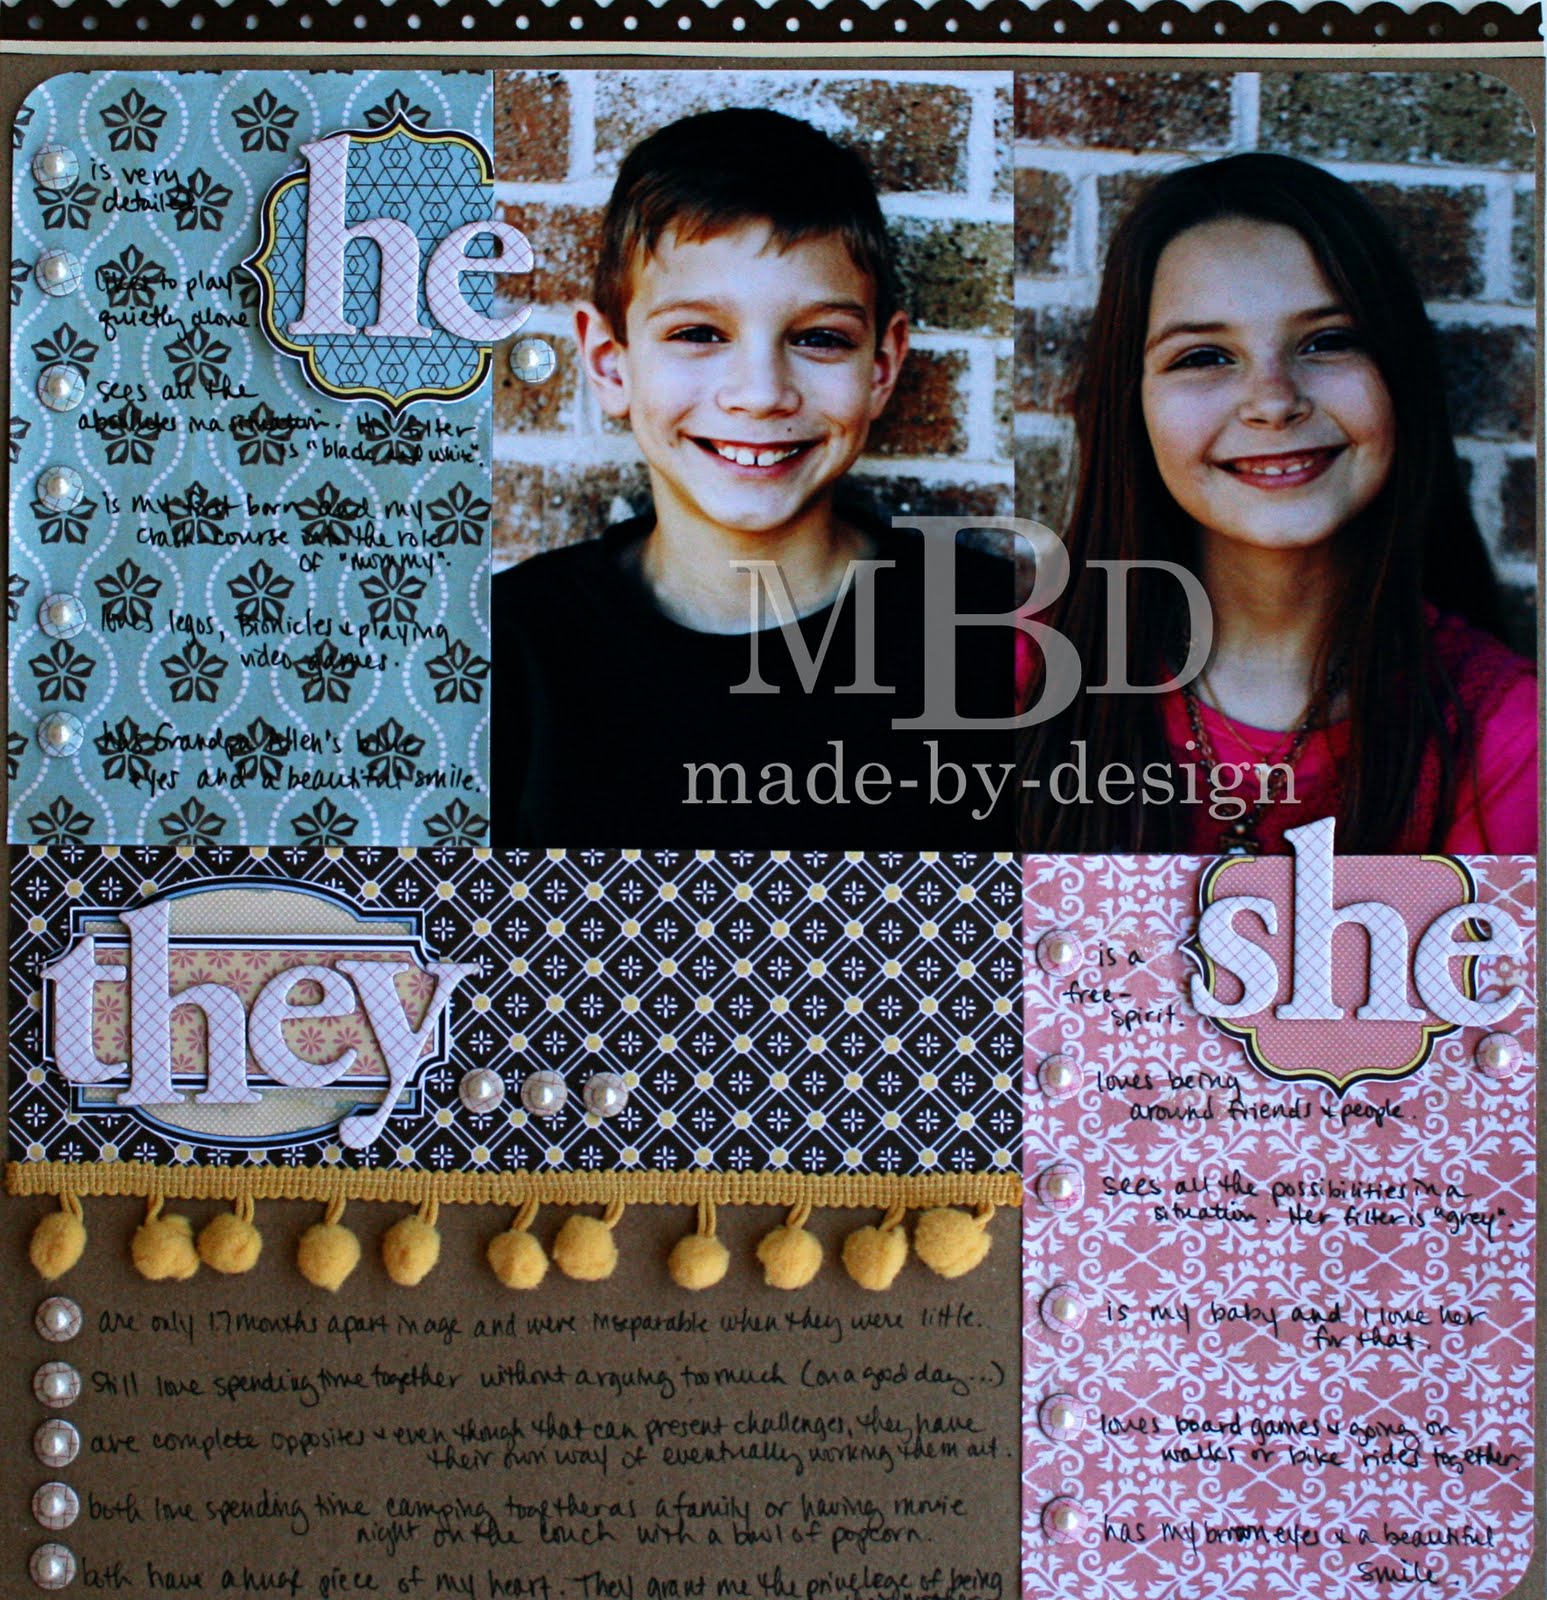
I was inspired to create this layout with these photos I had sitting on my desk. My original thoughts were he/she for the title with just the pink and blue paper and the photos in the center of the layout. But I knew there was more to my journaling that I wanted to add instead of just the differences between them--I wanted to include their similarities. So the layout evolved into this as I was pushing the photos around on the page. I LOVE how this turned out. Kind of reminds me of a Venn diagram where you have the two distinct circles and then the part in the middle where they are combined.

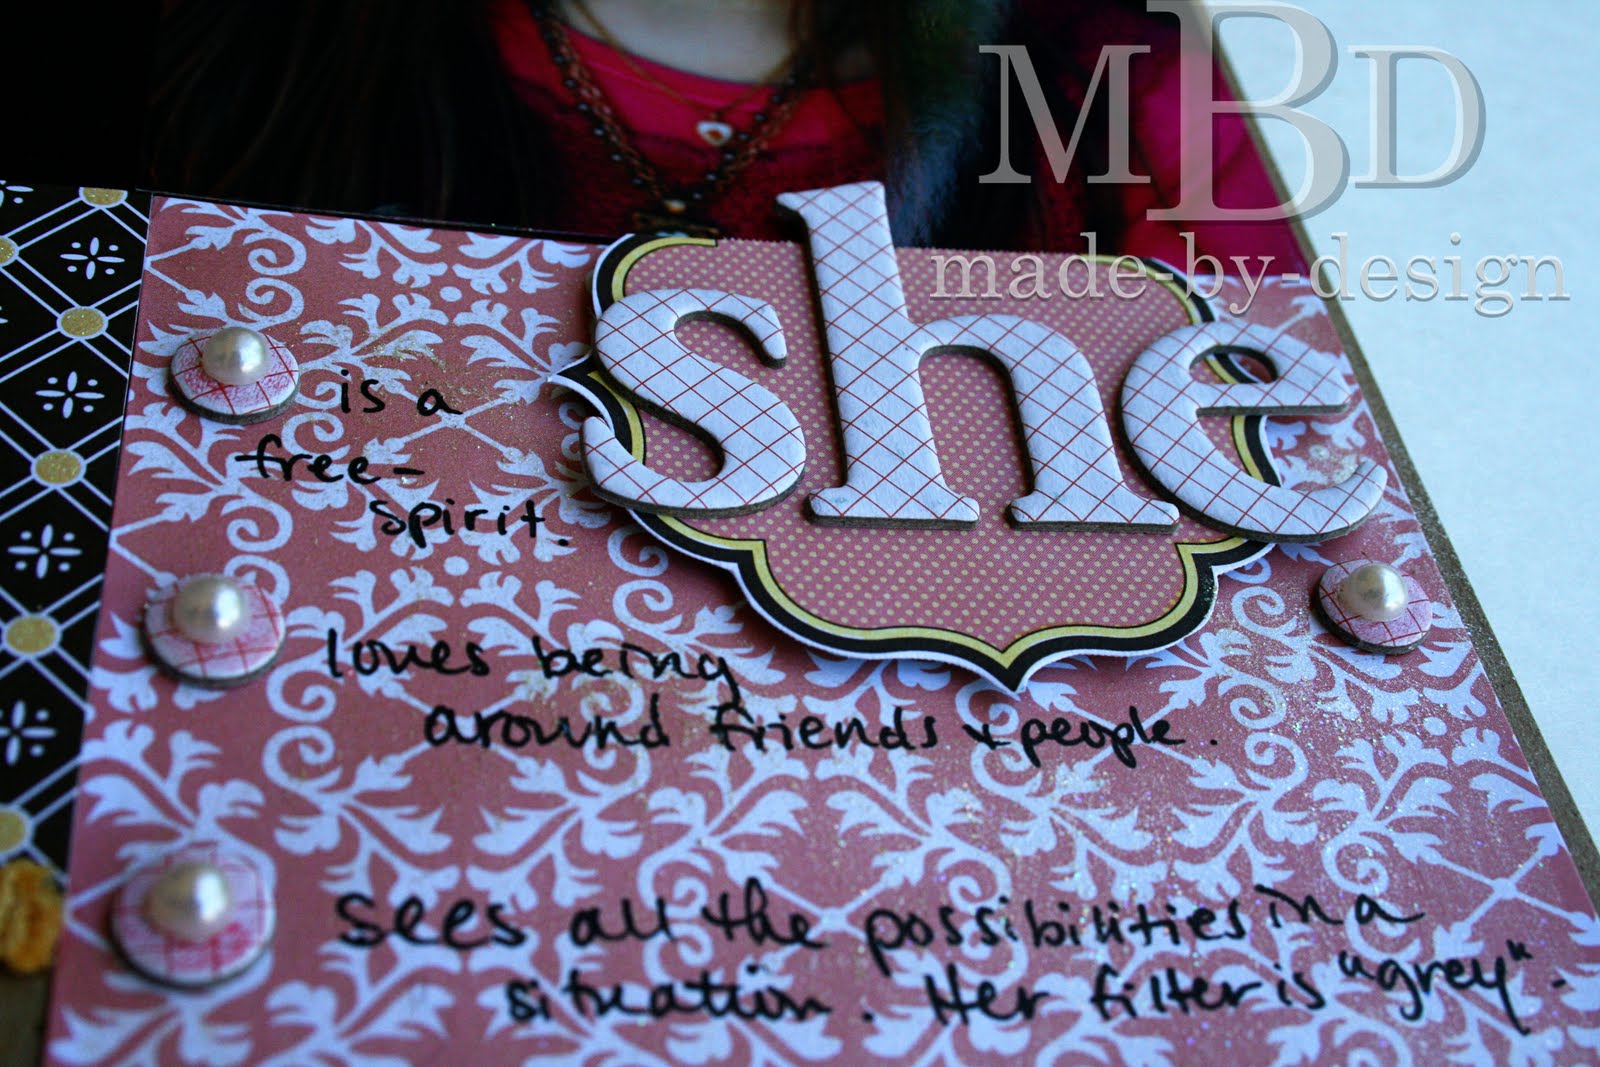 For each section, I used the chipboard letters to set them apart. My son's section was titled "he" and I used the blue paper for the background. My daughter's section was pink and it was titled "she". The smaller label for each section was handcut from the label paper and I colored the edge yellow with a marker to tie them both together with the combined "they" are. The letters are stuck on top of the label and the labels are attached with foam tape.

For these photos, please ignore that the coloring is off...they were taken inside under different lighting conditions, and they were the best I could get. :) I wanted to show how I added the chipboard circle dots for the bullet points of each section. At first, I just had them on the layout straight out of the package, with no changes. They were a little too white looking, so I tinted them with ink from an inkpad and a Qtip. I had to combine several colors to get the correct shade, but I love how easy that was with the Distress inks. They are perfect for custom blending. For the blue section, I used Antique linen first, then added some Tumbled Glass on top. The finished layout has small pearls added on top of the chipboard circles and I love how it looks. Here's the pink side with the bottom circles custom colored with the Worn Lipstick over the Antique linen and the top ones are tinted with the Antique linen shade only.
Here's the tan layer (below). I used Brushed Corduroy directly on these white circles and didn't need to mix them with any other color. The top circles are the original white color.

The section at the bottom was called "they". This is where I combined their similarities and was able to highlight my favorite ones. The main color for this section was yellow, although I tried to tie in the blue and pink too. The label was basically done the same as the other two titles, except I wasn't able to use just the yellow label on the bottom since one side was cut off as the paper was printed with labels overlapping the edges of the paper. I worked around this by adding another label on top. The big yellow label on the bottom has a blue outline that I colored with a waterbrush and some of the Tumbled Glass and Antique Linen ink mixed together on my craft sheet. It's not as clean of a line as the other two, and you can see where some of the color bled into the tag a little, but I like the look anyhow. The top label used more of the pink color, so that is why I colored the bottom label with the blue so all three colors were incorporated into this section.
 Here's another shot of the left side of the layout so you can see how everything was layered. I also used the ball fringe and I love how it turned out on the layout! I just glued it down with my regular ATG tape and then where the ends were cut, I added a little glossy accents to keep them from fraying.
 I hope you enjoyed today's layout share! :)

The section at the bottom was called "they". This is where I combined their similarities and was able to highlight my favorite ones. The main color for this section was yellow, although I tried to tie in the blue and pink too. The label was basically done the same as the other two titles, except I wasn't able to use just the yellow label on the bottom since one side was cut off as the paper was printed with labels overlapping the edges of the paper. I worked around this by adding another label on top. The big yellow label on the bottom has a blue outline that I colored with a waterbrush and some of the Tumbled Glass and Antique Linen ink mixed together on my craft sheet. It's not as clean of a line as the other two, and you can see where some of the color bled into the tag a little, but I like the look anyhow. The top label used more of the pink color, so that is why I colored the bottom label with the blue so all three colors were incorporated into this section.


Tuesday, April 27, 2010
Thank You layout share
For April, Jill at Memorable Seasons sent the Design Team members the American Craft Letterbox collection.
I love how the papers and embellishments have a mix of pinks, blues, yellows, greens and even some orange. They are quite versatile to use with either boy or girl photos and I've had a blast creating layouts with them for her store. The layout I made for the April Let's Scrap sketch used these same papers. click here to see that layout.
Here's another layout I wanted to share...

I used some Close To My Heart Fancy Frame Templates to create the curved edges on the brown and white floral pattern papers. I just traced them with a pencil, then cut them out by hand. I traced around the cut shapes with a white pen. The photos were matted with some light yellow cardstock that was punched with the Apron Lace border punch. My journaling was added by writing on white cardstock scraps, then cutting them into strips with a pair of scissors. The strips are adhered to the layout with foam tape to give them dimension.

To create my title, I cut out one of the labels printed on the Sincerely paper, then added a rub on from the coordinating Letterbox glitter rub on sheet. I love how easily I was able to create a great title accent. This was also mounted with foam tape. To pull the colors throughout the layout, I added one of the Letterbox Dimensional stickers (flower) to the title area and some buttons in several places on the layout.

To create the custom colored doilies, I used a plain white doily that I received in my design team kit and colored it by spraying it with a brown glimmer mist, then I painted the doily with the gold Blingz...wow!! It sure sparkles in real life...I tried to capture that in a photo...see below.

The small date label was punched from some pink cardstock and I added some deeper color to it with a sponge and a darker pink inkpad. The pink and blue buttons were threaded with white crochet thread and the yellow buttons were already pre-threaded with some tan hemp.
Supplies used on this layout:
American Crafts Letterbox Paper Collection:
*Signature Glitter Finish Paper
*Cheers Glitter Finish Paper
*Sincerely Paper (cut out label)
*American Crafts Mini Post Phrases Rubons (word Thank You)
*American Crafts Letterbox Dimensional Stickers
*Shimmerz Blingz Gold Glimmer
*Fresh Print Clothesline Doilies (Little Yellow Bicycle)
CTMH Fancy Frame Template
Autumn Leaves Buttons, EK Success Button Ups
Tattered Angels Glimmer Mist (Tattered Leather)
EK Success Photo label punch
Fiskars Apron Lace Edge Punch
Brown, yellow and white cardstock
White Crochet thread
Ranger Inkssentials white pen, Distress Ink (Worn Lipstick)
Zig black marker
Foam Tape
* Products received as a Design Team Member for Memorable Seasons online store.
Monday, April 26, 2010
Card Share...
I made quite a few cards from my leftover scraps using the BoBunny Sophie line from Memorable Seasons.
Here's the first card:


Supplies used:
*BoBunny Sophie Line: Bouquet
*BoBunny Sophie: Tickled Pink
*BoBunny Sophie: Silhouette
Cream Cardstock
Ranger Distress Inkpads: Tattered Rose, Brushed Corduroy, Walnut Stain
Technique Tuesday Stamp (Saying)
ColorBox Fluid Chalk Ink: Alabaster
Prima Flower, Autumn Leaves Button, Brown Crochet Thread
Martha Stewart Loop Edge Punch
Fiskars Apron Lace Border Punch
Heidi Swapp Distress Tool
* Products I received from Jill from Memorable Seasons as a Design Team Member
Here is the next card I created:


Supplies used:
Brown and Cream Cardstock
*BoBunny Double Dot: Mulberry
*BoBunny Cardstock Stickers: Pretty Sisters
Technique Tuesday stamp (saying)
Martha Stewart Stamp (background)
ColorBox Fluid Chalk Inkpads: Alabaster, Chestnut Roan
Making Memories Buttons, White crochet thread
We R Memory Keepers Corner Chomper
Foam Tape
* Products I received from Jill from Memorable Seasons as a Design Team Member
This is the next card:


Supplies used:
*BoBunny Double Dot: Mulberry Paper
*BoBunny Cardstock Stickers: Friends to the End
ANW Crestwood stamp set: Cherry Blossoms
Cream Cardstock
Fiskars Apron Lace Border Punch
Martha Stewart Ribbon
Memento Black Inkpad
Colored Pencils, Gamsol and Paper Blending Stumps
Pink Gemstones
WeR Memory Keepers Corner Chomper
* Products I received from Jill from Memorable Seasons as a Design Team Member
Another card to share...


Supplies Used:
*BoBunny Sophie Paper: Stripe
*BoBunny Double Dot Paper: Mulberry
*BoBunny Cardstock Stickers: Friends to the End
Cream Cardstock
Paper Trey Ink Polka Dot stamp set
Ranger Tumbled Glass Distress Inkpad
Ranger Rock Candy Distress Stickles
Fiskars Apron Lace Border Punch
WeR Memory Keepers Corner Chomper
* Products I received from Jill from Memorable Seasons as a Design Team Member
And the last card to share:

Supplies used:
*BoBunny Sophie Paper: Stripe
*BoBunny Cardstock Stickers: Friends to the End
*BoBunny iCandy Brads
Cream cardstock
Circle Punch
Memento Black Inkpad
Stamp: Moments to Remember
*BoBunny Sophie Paper: Stripe
*BoBunny Cardstock Stickers: Friends to the End
*BoBunny iCandy Brads
Cream cardstock
Circle Punch
Memento Black Inkpad
Stamp: Moments to Remember
* Products I received from Jill from Memorable Seasons as a Design Team Member
Friday, April 23, 2010
Layout Share...Christmas Cook
I created this layout from more of the BoBunny Sophie collection I received from Jill over at Memorable Seasons.

I used the matching diecut paper and accented the scallops with some pink gemstones.

I used some pink paper scraps from the same line to mat my title. The glitter chipboard stickers are coated with Glossy Accents to make them really shine.

I finished off the layout by stamping a leaf image and adding some more pink gemstones in the centers to mimic holly leaves and berries.

Supplies Used on this layout:
*BoBunny Sophie Paper: Rae
*BoBunny Sophie Diecut Paper: Frills
*American Crafts Glitter Thickers: Niki Riki
Ranger Glossy Accents
Close To My Heart Leaf Stamp
Ranger Forest Moss Distress Inkpad
The Paper Studio Pink Gemstones
WeR Memory Keeper Corner Chomper
EK Success Brown pen
*BoBunny Sophie Paper: Rae
*BoBunny Sophie Diecut Paper: Frills
*American Crafts Glitter Thickers: Niki Riki
Ranger Glossy Accents
Close To My Heart Leaf Stamp
Ranger Forest Moss Distress Inkpad
The Paper Studio Pink Gemstones
WeR Memory Keeper Corner Chomper
EK Success Brown pen
* Products I received from Memorable Seasons as Design Team products
Thursday, April 22, 2010
Enjoy the Journey -- April Lets Scrap Sketch
This is a layout created from a sketch by Cheri O'Neill from Let's Scrap. This sketch was exclusively posted over at the Memorable Seasons message board. It's a really great sketch and was very easy to customize to fit my photos and products.
Here's my layout I created....

I created the decorative edge on the layout by folding a strip of paper in half and tracing a curve onto it, then cutting it out. Then I traced the curved edge onto the back of the floral paper. For the corners and sides, I just matched up the cut strip with the curve I had already traced along the top. To create the bigger pink mat for this curve shape, I used a pencil and sketched out the curve, leaving a 1/4" border, then I cut it out. Both the floral layer and the pink layer have sponged edges, so it hides any imperfections in my cutting.

To create the title, I used some gold Blingz paint on the printed chipboard letters and dried it with a heat gun. This gave a soft shading to the letters and they are so shimmery...but that didn't photograph well. Just trust me, they are BEAUTIFUL! :) I did trace around the chipboard letters with a brown marker so they showed up more against the white floral background.

For the rest of the title, I used some of the tiny alphabet stickers to spell out the word "the" and I used a stamp to create the word "journey". I punched a photo label from the pink pattern paper sheet I used with the buttons, then turned it over to use the solid blue side. I sponged the edge of the label and stamped the word "journey" onto it with versamark ink, then embossed it with white embossing powder. To make the label pop a little more, I outlined the shape with a brown marker and then attached it to the layout with foam tape. I also included some brown pen stitching around the floral paper on the pink mat.

To create the buttons, I used a 1" circle punch and glued those circles to the back of the clear buttons with glossy accents adhesive. After the buttons were dry, I punched the holes with a paper piercer and threaded brown crochet thread through the holes to give them a stitched look. The buttons were attached to the layout with more of the glossy accents. I really like how it holds my embellishments on my projects and it dries clear. I also punched another small photo label so I could include the date at the bottom of the layout. One other thing you will notice in the photo below are the words "enjoy the journey" on a white background. These were from the coordinating rub-on sheet that goes with the papers I used on this layout. It was a white label with a brown border, but I didn't want to have it cover up my photo, so I cut it to the width of the ribbon and applied it directly to the ribbon. I will use the other curvy parts of the white label on another project...be sure to watch for it!

My journaling was written along the bottom of the layout just under the blue pattern paper. I wanted to keep it streamlined and simple so the photos would stand out more. I also tied a ribbon into a bow and then wrapped the long ends around the blue pattern strip before I glued it down to the layout. I love how it's a clean bow with no tails to worry about. :) You can also see the white faux stitching I did around the yellow paper with a white pen.

The last detail I wanted to share was the tone-on-tone stamping I did on the brown background before the layout was assembled. I used a stamp from Tim Holtz that had the words all lined up on top of each other. It says "Time is a companion that goes with us on the journey. It reminds us to cherish each moment because it will never come again. What we leave behind is not as important as how we lived". I loved that saying and I was thrilled how it turned out when I stamped it with the versamark inkpad. Looks just like a watermark. You can see a photo of that detail below...

Supplies used on this layout:
American Crafts Letterbox Collection of Papers--
*Madam Embossed paper
*Adieu paper
*Respectfully paper
*Letterbox Mini Post Phrases Rubons
*American Crafts Thickers: Coral Criss Cross Pattern
*Shimmerz Blingz: Gold Glimmer
Tim Holtz-Stamper's Anonymous: Going Somewhere stamp set (purchased previously from Memorable Seasons)
Technique Tuesday "journey" word stamp
Versamark Inkpad, white embossing powder
Ranger Distress Inkpads: Brushed Corduroy, Spun Sugar
Making Memories Tiny alpha stickers
EK Success Punches: 1" circle, Photo Labels
Autumn Leaves clear buttons
Bazzill Basics brown gingham ribbon
Brown, pink and yellow cardstock
WeR Memory Keepers Corner Chomper
Brown Zig Marker, Ranger Inkssentials white Pen
Hand-cut template for curvy edge*Products I received as a member of the Memorable Seasons Design Team to use on my monthly projects.
Wednesday, April 21, 2010
Layout to share...What I have Learned
Here is another layout I created with the BoBunny Sophie line from Memorable Seasons.
I loved the simple floral border on this awesome cream notebook paper.
 The brown center paper was a leftover scrap I had from another layout and I added some white pearls and pink gemstones to the dots to create some interest. I also added the pearls and gems to some of the flowers and butterflies on the floral background.


 My title was stamped and I outlined it with the same brown pen I used for my journaling.
 Supplies used for this layout:
*BoBunny Sophie Line: Notebook
*BoBunny Sophie: Tickled Pink
*BoBunny Sophie: Rae
*BoBunny Sophie: Stripe
The Paper Studio White Pearls and Pink Gemstones
Ranger Tumbled Glass Distress Inkpad
Heidi Swapp Alphabet stamps
Fiskars Apron Lace Border Punch
EK Success Brown Pen
*Products I received as a Design Team Member for Memorable Seasons online store.
I loved the simple floral border on this awesome cream notebook paper.


*BoBunny Sophie Line: Notebook
*BoBunny Sophie: Tickled Pink
*BoBunny Sophie: Rae
*BoBunny Sophie: Stripe
The Paper Studio White Pearls and Pink Gemstones
Ranger Tumbled Glass Distress Inkpad
Heidi Swapp Alphabet stamps
Fiskars Apron Lace Border Punch
EK Success Brown Pen
*Products I received as a Design Team Member for Memorable Seasons online store.
Tuesday, April 20, 2010
Layout Challenge...Altering premade embellishments
I have quite a collection of embellishments that are already premade. They are quite good timesavers when you are trying to crank out some layouts! But sometimes you would love to use the embellishment on your layout, except it has a saying that doesn't work with your photos or it has a themed icon, and it doesn't match the rest of your layout. So what's a girl to do? Make it work for you...and alter the crud out of it!! :) My challenge to you this week is to use those pre-made and themed embellishments you have been hoarding and alter them to fit your projects!
One of my favorite ways to alter sticker type embellishments that have sayings is to cover those words with words that work for my project. Here's a great example...this is the sticker before I started altering it. I wanted to use it on a layout about my daughter, and the "sister" saying wouldn't have worked for this project.

 I really liked how the saying was printed onto the sticker itself with strips of inked words, so I did the same thing and printed my saying onto some scrap cream card stock using my printer. Then I cut the words down into smaller strips and inked the edges with my Walnut Stain ink pad and a sponge.

 These pictures show a little more detail of how I used my new printed journaling strips to alter my stickers. These first two pictures were taken before I added the ink to the edges. The third picture below was taken after I finished altering the top sticker.


 These pictures show the alteration steps for the bottom sticker following the same basic steps.

 Here is the finished layout...I added some lace along the bottom of the layout and also used the same edge distresser tool to rough up the edges of the pattern papers. I used some ribbon along the middle of the strip towards the bottom. Then I added some pearl brads and the coordinating iCandy brads from the same BoBunny collection along with a tiny label sticker for the date.
 I love how quickly this layout came together and how it looks like I spent a long time making those embellishments when they were just pre-printed flat stickers. :) I also really like the pop of white along the distressed edges and how it ties in with the white in my photos and the lace.
Supplies used on this layout:
BoBunny Sophie Paper collection (Sophie Silhouette)
BoBunny Jazmyne Cardstock stickers (Pretty Sisters)
BoBunny iCandy Brads (Sophie Line)
K&Co Pearl Brads
Making Memories Funky Vintage Ribbon
Lace
Printer and Curlz Font
Ranger Walnut Stain Ink Pad & Sponge
Scrap cream cardstock
7Gypsies Label Sticker
Brown cardstock
Heidi Swapp Edge Distresser Tool
Foam Tape
Looking forward to seeing your projects for this challenge...be sure to post them over in the Memorable Seasons gallery!
**This project was created with products I received as a Design Team Member from the Memorable Seasons online store.
One of my favorite ways to alter sticker type embellishments that have sayings is to cover those words with words that work for my project. Here's a great example...this is the sticker before I started altering it. I wanted to use it on a layout about my daughter, and the "sister" saying wouldn't have worked for this project.

So I started the altering process by sanding the edges with my Heidi Swapp edge distresser tool. If you don't have one of these cool tools, you can also use the edge of a sharp pair of scissors to rough up the edges of your paper or sticker. I also ended up adding some baby powder to the back of the sticker so it was easier to work with and it didn't stick to everything and I was able to alter it. I added some adhesive to it at the end when I was finished.


Supplies used on this layout:
BoBunny Sophie Paper collection (Sophie Silhouette)
BoBunny Jazmyne Cardstock stickers (Pretty Sisters)
BoBunny iCandy Brads (Sophie Line)
K&Co Pearl Brads
Making Memories Funky Vintage Ribbon
Lace
Printer and Curlz Font
Ranger Walnut Stain Ink Pad & Sponge
Scrap cream cardstock
7Gypsies Label Sticker
Brown cardstock
Heidi Swapp Edge Distresser Tool
Foam Tape
Looking forward to seeing your projects for this challenge...be sure to post them over in the Memorable Seasons gallery!
**This project was created with products I received as a Design Team Member from the Memorable Seasons online store.
Monday, April 5, 2010
Layouts to share...
I've really had fun working with the BoBunny Sophie line of products from Memorable Seasons. You can find all the products I used in their online store here.

This layout was created for a sketch from Cheri O'Neill over at Let's Scrap...see the link to the exclusive sketch here.

I used some pink ink to tint the chipboard alphabet letters, then I coated them with Glossy Accents to seal them.

Instead of using a second photo, I used three of the cardstock stickers and created a grid of accents and included my journaling in the blank space. I added glossy accents or stickles to the centers of the flower stickers. In this photo, you can also see how I cut the dark pink paper to look like a ribbon to fit the sketch. Then I placed my title letters on top of the dark pink paper.

I added a tab in place of the journaling area shown in the original sketch.The scallop border was created with the small corner rounder punch from EK Success after taking off the removable corner guide.

To finish this layout off, I added stickles glitter to the center of the tiny flowers printed on the pattern paper. You can also see some of the black zig zag machine stitching that I included around the main sections of the layout.
Supplies I used for this layout:
Bo Bunny Sophie Paper Collection (Tickled Pink, Rae, Mulberry Double Dot, Sophie)
Bo Bunny Cardstock Stickers: Pretty Sisters
American Crafts Thickers (Coral Criss Cross)
Ranger Glossy Accents, Spun Sugar Distress Ink pad, Cotton Candy Stickles
EK Success Small Corner Rounder Punch
McGill File Tab Punch
Date Stamp and Memento Black Ink pad
Black Thread and Sewing Machine (zig zag stitch)
********************************************************************
For my next layout, I did another two-pager. :) I have been keeping a bunch of letters and notes my daughter has written me over the years and I wanted to use them all on one layout. This one is called "Love Notes".


I found some pictures of the two of us together giving each other kisses and thought these would be perfect for this layout.

I love how the coordinating cardstock stickers worked with this layout. I used the you&me sticker near the photos and the butterfly sticker on the other page. The only things I did to accent the stickers were to add a white pearl I colored with a brown sharpie marker. The stickers themselves are attached to the layout with foam tape and I adhered them to the centers of some flowers.

This photo shows a lot of the little details in this layout. The yellow flowers were all white paper flowers that I colored yellow with the Wild Honey Distress ink pad and a makeup sponge. The brads (glittery and epoxy style) were all from the coordinating BoBunny iCandy embellishment set. The title of the layout was created with chipboard alphabet stickers (Thickers). The cardstock sticker used on the large flower was accented with the brown colored pearls and I backed the sticker with a punched circle (distressed with sandpaper) and some coordinating dark pink polka dot paper strips.

I also used the glittered brads and epoxy brads in groups of three around the layout.This photo shows the scallop punched borders I used on the layout. These were embellished with some pink velvet ribbon and I made sure the ribbon was secured with the Tiny Attacher (mini staples) from Tim Holtz. This section is the only area where I added my own journaling. All the other areas include the notes from my daughter:

Supplies I used on this layout:
Bo Bunny Sophie line of papers (Dot, Bouquet)
Bo Bunny Cardstock Stickers: Friends to the End
Bo Bunny iCandy Brads
American Crafts Thickers (Coral Criss Cross)
Imaginisce and Bazzill Basics White Paper Flowers
Ranger Wild Honey Distress Ink pad and makeup sponge
The Paper Studio Pearls (white) and Brown Sharpie Marker
Making Memories Pink Velvet Ribbon
Tim Holtz Tiny Attacher
Fiskars Threading Water Border Punch
The Paper Studio 1 7/8" Circle Punch
Purple and Kraft Cardstock
Foam Tape, Sandpaper
Black Pen
Subscribe to:
Posts (Atom)